Last week, Wildfly community has just released Wildfly 9.0.0.Final and I wrote a post about enabling HTTP2 into Wildlfy via the offline command line. Today, we will see how to do it with a Docker container. Docker container simplifies lot of thing when we need to deploy middleware infrastructure. I love this technology, because it is an Open Source project, it provides lot of command line tools, the build process is automated and streamlined, and the run process is very easy to manage.
How to setup HTTP/2 configuration into Wildfly 9.0.0.Final with offline mode via Docker container.
Let’s see how to do it step by step.
Requisites
Docker is already installed and running on your system. Please see the official documentation for installation instructions if needed.
X509 Certificate
HTTP/2 doesn’t strictly require an encryption layer for transport, but most browsers only implement it over TLS, so we’ll implement it in this example for practical reasons.
Create certificates as I described in my previous blog post about Wildfly and HTTP/2.
Warning
Be Careful, Firefox doesn’t accept self-signed certificates anymore (to confirm this, I switched to Chrome for testing). I will post soon a full shell script for PKI generation to make this process easier ;-)
Build the Wilfly Docker image
In this section, we will build the wildfly-http2 docker image that includes all necessary configurations.
But before building it we have to create a directory and copy the following files:
-
previous keystore.jks and trustore.jks files (your SSL certificates)
-
offlinecli-http2.cli file - this contains the commands to configure HTTP/2 in Wildfly
You can download it directly with:
curl https://gist.githubusercontent.com/gautric/604e885885df0ed042f8/raw/f7d668edd82c35c23215a8a812074a4d47e1688b/offline-http2.cli -o offlinecli-http2.cli
- Dockerfile file - this defines how to build our Docker image
You can download it directly with:
curl https://gist.githubusercontent.com/gautric/c705e9e8572dd84b2bd9/raw/3ebfe805e767343f91104ef87ff3c0793f3efdd3/Dockerfile -o Dockerfile
Build your image with the following command line:
docker build --rm=true --tag=wildfly-http2 .
You should see an output similar to this:
[mbp:~/Source/local/wildfly-docker]$> docker --tlsverify=false  build --rm=true --tag=wildfly-http2   .
Sending build context to Docker daemon 74.75 kB
Sending build context to Docker daemon
Step 0 : FROM jboss/wildfly
 ---> e908c8c95a8b
Step 1 : ENV ALPN_VERSION 8.1.3.v20150130
 ---> Using cache
 ---> 87116bbedcb5
Step 2 : ENV ALPN_LIB_DIR /tmp/eclipse/lib
 ---> Using cache
 ---> b4672d6008ee
Step 3 : ENV HTTP2_ENABLE_CLI offlinecli-http2.cli
 ---> Using cache
 ---> 635ac811b927
Step 4 : ADD keystore.jks /opt/jboss/wildfly/standalone/configuration/keystore.jks
 ---> Using cache
 ---> d0e62373566c
Step 5 : ADD truststore.jks /opt/jboss/wildfly/standalone/configuration/truststore.jks
 ---> Using cache
 ---> f3e274485c1c
Step 6 : RUN mkdir -p $ALPN_LIB_DIR
 ---> Using cache
 ---> fd2da0f5ee22
Step 7 : RUN curl http://central.maven.org/maven2/org/mortbay/jetty/alpn/alpn-boot/$ALPN_VERSION/alpn-boot-$ALPN_VERSION.jar > $ALPN_LIB_DIR/alpn-boot-$ALPN_VERSION.jar
 ---> Using cache
 ---> f8032e23c9b5
Step 8 : ENV JAVA_OPTS "$JAVA_OPTS -Xbootclasspath/p:$ALPN_LIB_DIR/alpn-boot-$ALPN_VERSION.jar"
 ---> Using cache
 ---> 3e49cf6ca1c6
Step 9 : ADD $HTTP2_ENABLE_CLI /tmp/
 ---> Using cache
 ---> e309bce6ec5a
Step 10 : RUN /opt/jboss/wildfly/bin/jboss-cli.sh --file=/tmp/$HTTP2_ENABLE_CLI
 ---> Using cache
 ---> 85fb55ecc742
Step 11 : RUN rm -rf /opt/jboss/wildfly/standalone/configuration/standalone_xml_history
 ---> Using cache
 ---> 566da0a2cb80
Step 12 : CMD /opt/jboss/wildfly/bin/standalone.sh -b 0.0.0.0
 ---> Using cache
 ---> 3372a817bfc1
Successfully built 3372a817bfc1
The build process performs several important steps:
- Uses the official jboss/wildfly image as a base
- Sets up the ALPN (Application-Layer Protocol Negotiation) library needed for HTTP/2
- Adds our SSL certificates
- Runs our offline CLI script to configure HTTP/2
- Configures the server to bind to all network interfaces (0.0.0.0)
Startup the Wilfly Docker image
After a full and correct configuration, you can start the JBoss instance as a container via Docker. Start it with this command:
docker run -it -p 9990:9990 -p 8080:8080 -p 8443:8443 wildfly-http2
This command maps the necessary ports from the container to your host machine:
- 8080: HTTP port
- 8443: HTTPS port (where HTTP/2 will be available)
- 9990: Management interface port
Check it
After a very quick JBoss startup inside the Docker container (about 3 seconds), you can check the welcome page (with Linux Docker) or the welcome page (with MAC OSX Docker) with your favorite browser like Chrome.
To verify that HTTP/2 protocol is being used, open the network panel available inside Chrome’s developer tools.
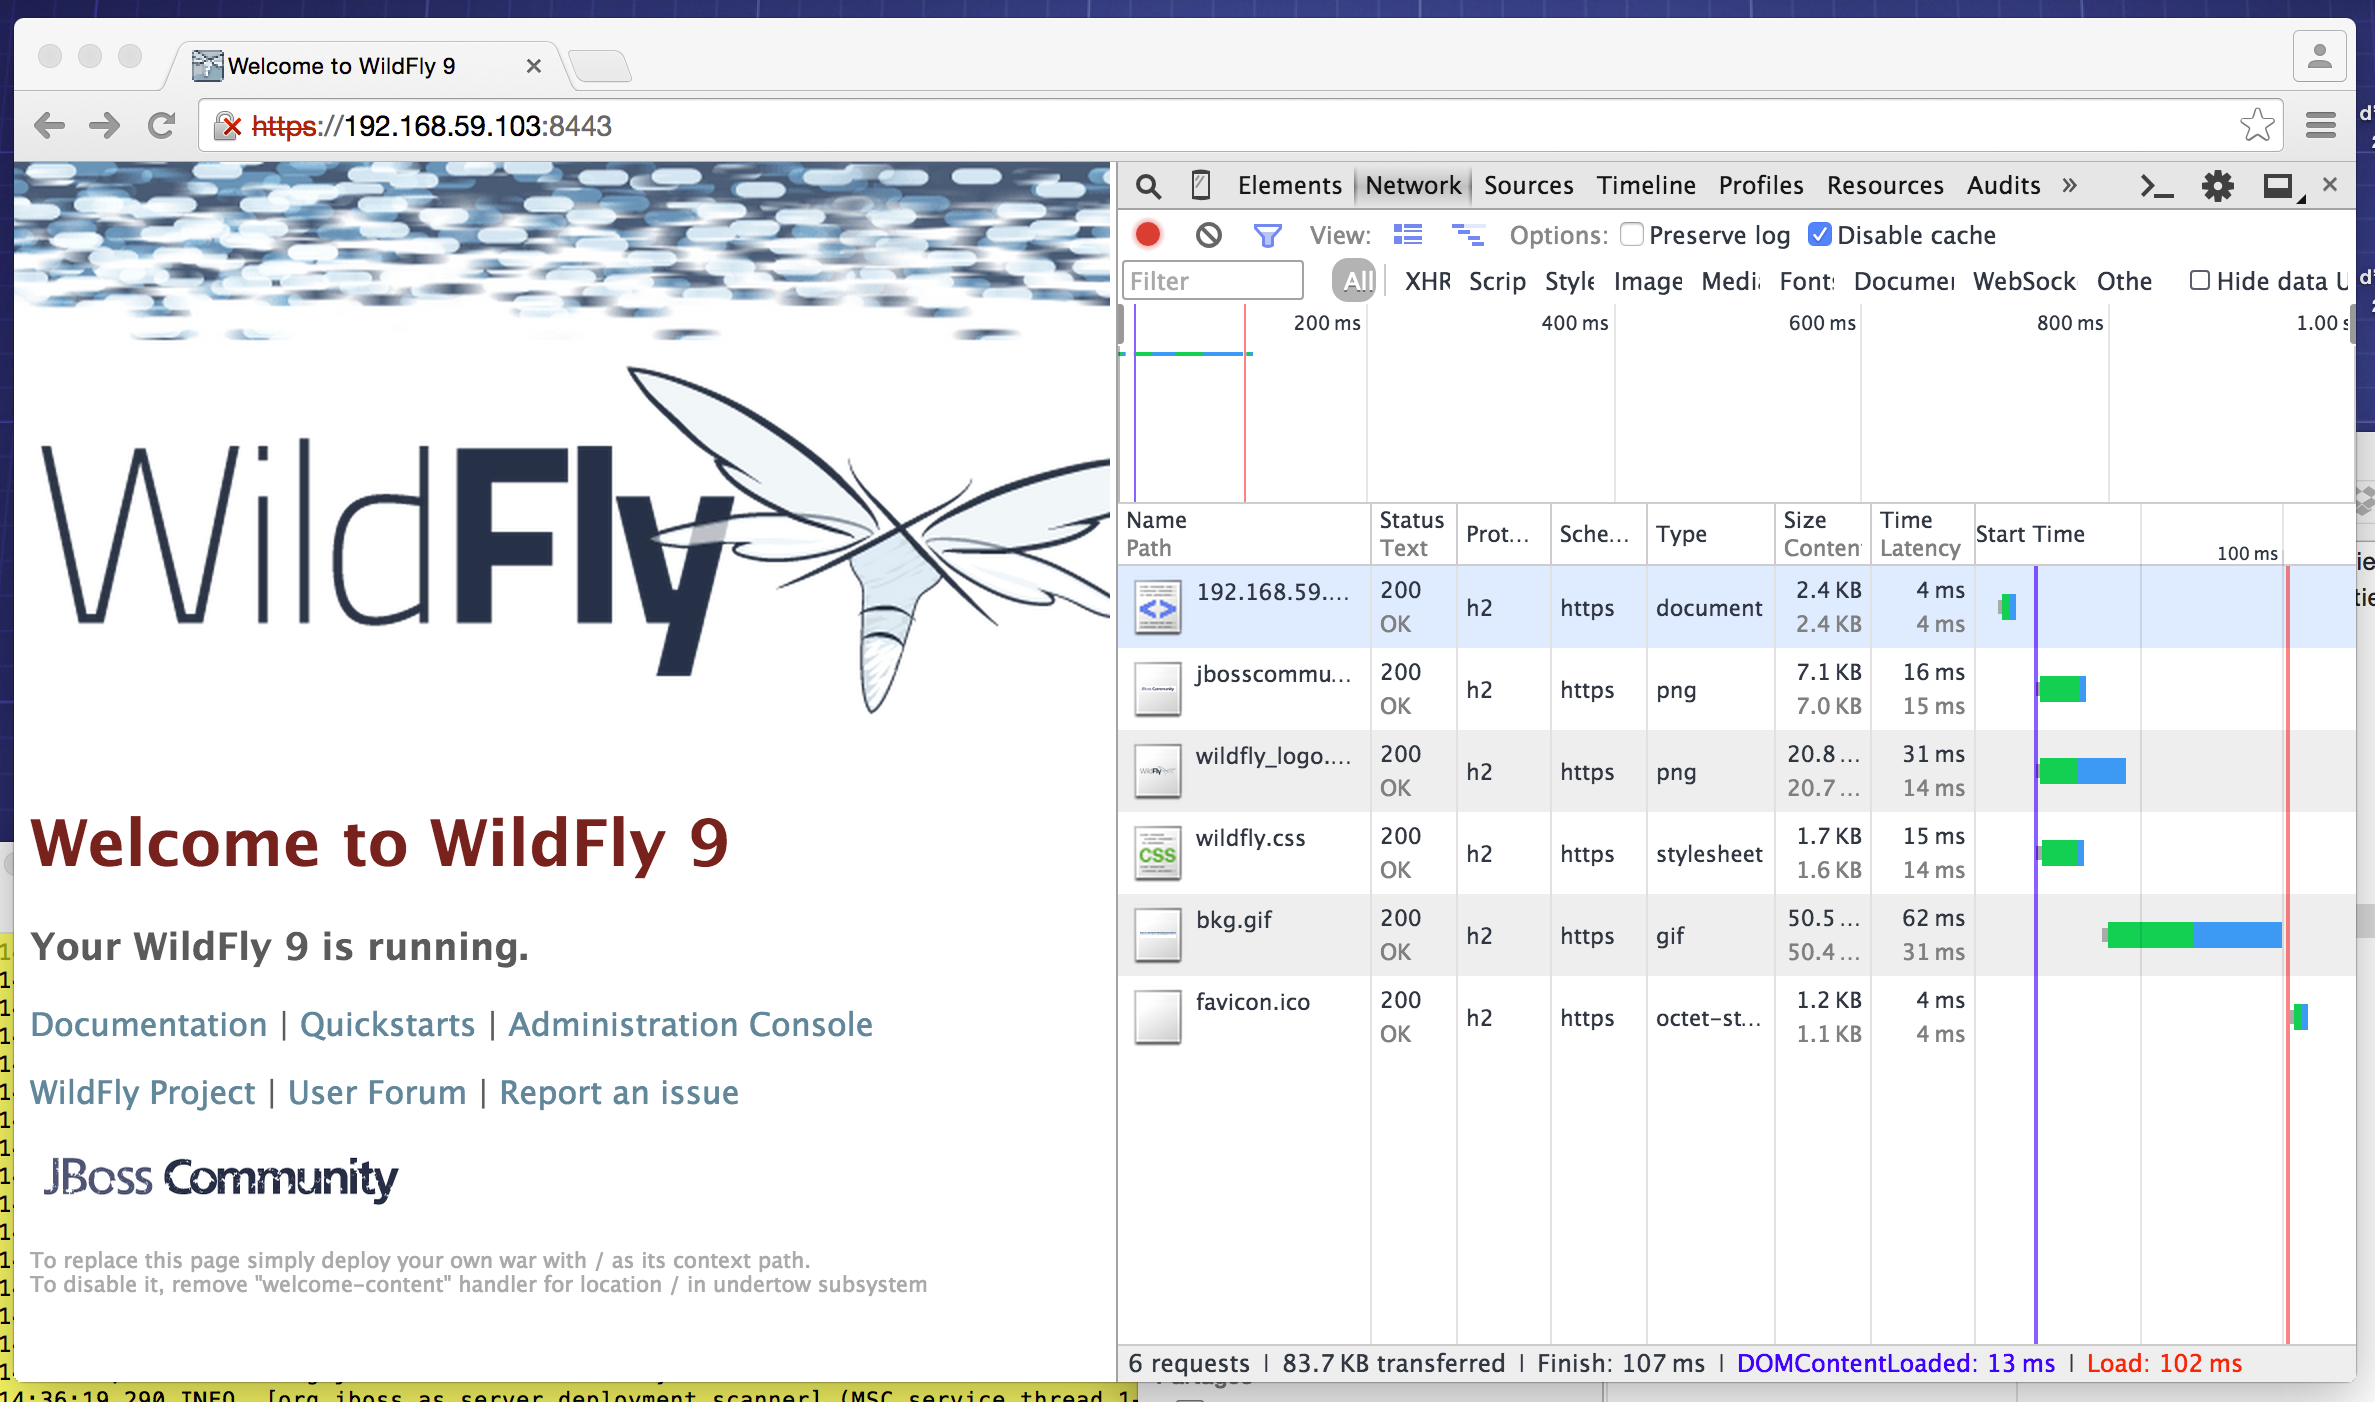
The network panel should show “h2” as the protocol, indicating that HTTP/2 is successfully being used.
Conclusion
Docker (today) and HTTP/2 (tomorrow) will be inevitable technologies for their specific reasons. The first one simplifies full stack deployment from the OS to application including middleware, enabling consistent environments across development and production. The second one is an huge update of the WWW protocol to improve network performance (binary header), latency (multiplexing) and security (TLS recommended).
By combining these technologies, we can quickly deploy modern, high-performance web applications with minimal configuration effort.
Useful links
- Wildfly Docker image - Official Wildfly Docker image
- Offline CLI - Documentation on Wildfly’s offline CLI capabilities
- HTTP/2 - Details on HTTP/2 implementation in Wildfly
- Docker - Docker official website